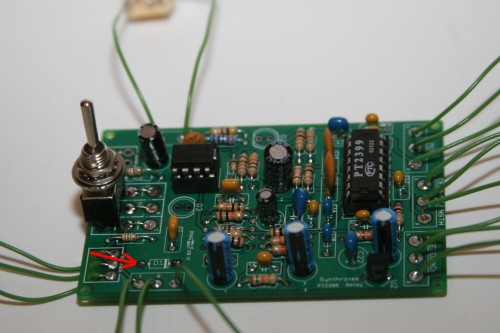
The PT2399 Delay doesn’t have an on/off switch, and you want to add one. Well those 3 holes along the edge where the Stomp Switch goes in the stomp box version provide a perfect spot to put a power switch.
Materials needed:
- 1N4148 or 1N914 Diode
- Wire
- SPST Switch
1) Remove D1.
2) Solder your SPST switch into the 2 holes farthest away from D1 as shown in the picture above. The switch will look centered in the three holes but is soldered into the 2 farthest away from D1 and the case of the switch is just resting over the third hole.
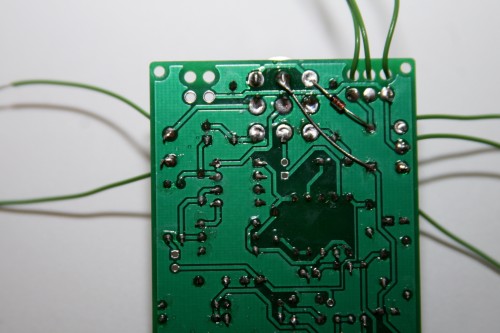
3) Flip over the board and solder your new D1 (1N4148 or 1N914) and a piece of wire as shown in the figure below. Diode’s mark goes toward the switch. We used uninsulated wire for our mod (actually it’s a snipped lead from another component), but insulated wire would be better to insure no shorting to incorrect points. We had to pull the wire away from the board a bit afterewards due to the lack of insulation. So make sure you use insulated and save yourself the headache.
4) Test and enjoy your new on/off switch that looks like it belonged there all along thanks to a few hidden wires on the backside.
Other boards with the 3PDT stomp switch could be similarly modified for a switch.
Happy Modding!


