Important Links
1U: Store Page
3U: Store Page
Assembly Instructions
Quick Start Tutorial
Thank you for purchasing the Synthrotek Eurorack Case Bracket kit!
Installing these brackets is a fairly easy project if you have some basic woodworking skills. If you feel like you can handle it, please proceed! If not, get some help from a friend with experience. You will need to use the exact parts that we include in this kit for the project to work out well.
Here is a video explaining the process detailed below:
There are two versions of the Eurorack Case Brackets. The original design comes with o-rings to help center the rail-mounting screws; the new design does not need them.
If your brackets do not have o-rings, click the image below:
If your brackets came with o-rings, click an image below:
Assembly Instructions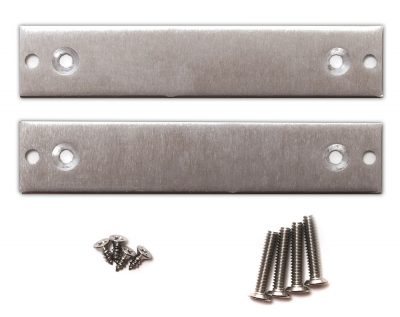
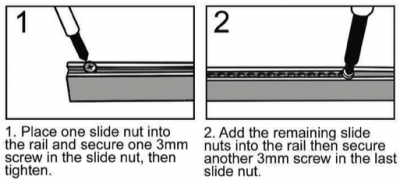
Start by inserting the slide nuts or nut strips into your rails.
You will receive 4x 10-24 x 1″ rail-mounting screws and 4x wood screws (for mounting in wood, etc). If you are not mounting to wood, you will need to find some bolts, etc. that will work with your project.
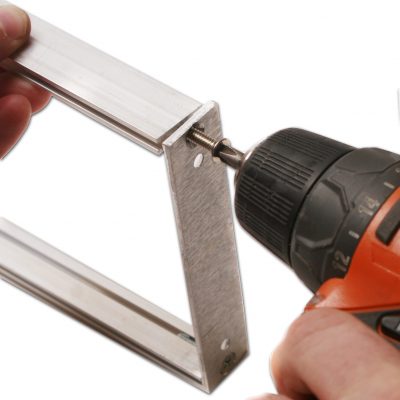
Screw the first screw into the top of the rail bracket and Synthrotek Eurorack Rail into the center slot as shown above. Orient the rail so that the rail’s center slot faces inward; do this for both the top and bottom rails. Do not over-tighten. It is OK to have slight possible rotation (if you twist hard). Once the bracket is lined up with the rail, tighten down a bit more.
The next step will depend on the type of case that you are making. We suggest that you hold the brackets in your case, carefully mark where the mounting holes should go and drill pilot holes before mounting. If you are mounting the brackets in a metal, fiberglass, etc. case, then mark your holes, drill and place nuts and bolts (not included) to secure. The brackets are designed so that the outer dimension of the brackets are almost exactly the same as the outside dimension of the rails. This allows you to butt-up the 3U brackets up to each other with little to no wasted space.
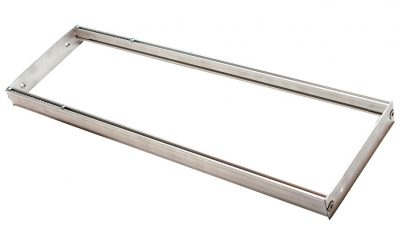
3U Eurorack Rails and Case Brackets Final
The next step will depend on the type of case that you are making. We suggest that you hold the brackets in your case, carefully mark where the mounting holes should go and drill pilot holes before mounting. If you are mounting the brackets in a metal, fiberglass, etc. case, then mark your holes, drill and place nuts and bolts (not included) to secure. The brackets are designed so that the outer dimension of the brackets are shallower than the rails. This allows 1U rails and 3U rails to touch each other and not the rails. This will help stabilize the 1U row.
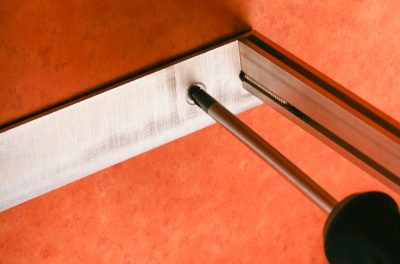
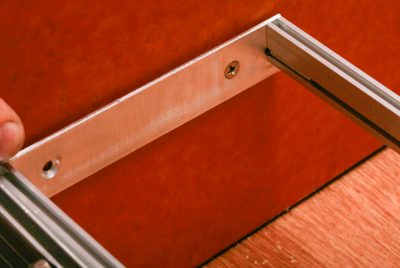
Screwing in wood screws into case
Check for level or desired angle before placing final screws. You are super close to being done! Just place a couple modules in on both ends to double-check the rotation of your rails and you are good to go!
Original (o-ring) Assembly Instructions
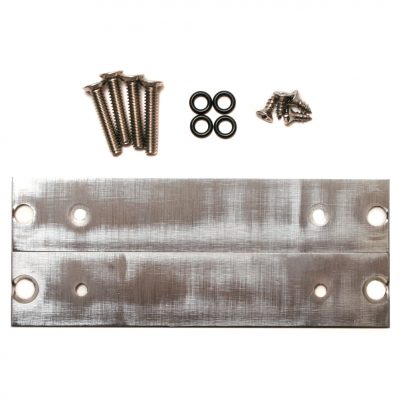
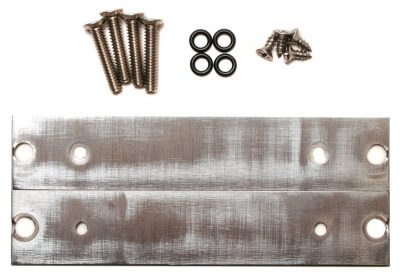
Eurorack 3U Case Bracket Parts
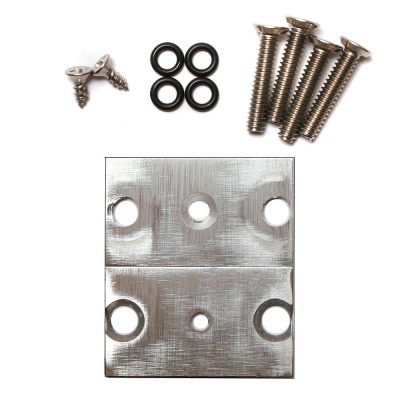
1U Eurorack Case Brackets
Start by inserting slide nuts or nut strips into your rails.

You will receive 4x 10-24 x 1″ rail mounting screws, 4x tightening o-rings and 4x (or 2x for 1U) #6 by 3/8″ wood screws (for mounting in wood, etc). If you are not mounting to wood, you will need to find some bolts, etc. that will work with your project.
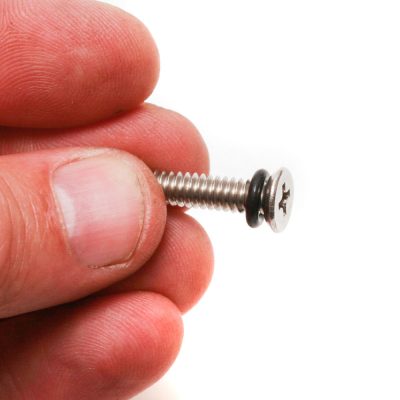
Add Tightening O-ring to rail screws
First take the 4 o-rings and place them onto the 4 rail screws and shown above.
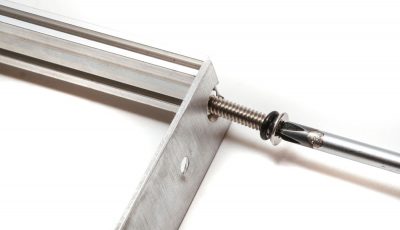
Screwing rail screws into bracket and rail
Now screw the first screw into the top of the rail bracket and Synthrotek Eurorack Rail into the center slot as shown above. Orient the rail so that the rail’s center slot faces inward; do this for both the top and bottom rails. Keep the o-ring in the center of the screw. Do not over-tighten. It is OK to have slight possible rotation (if you twist hard) of the rail as your modules will keep the rails in the proper place.
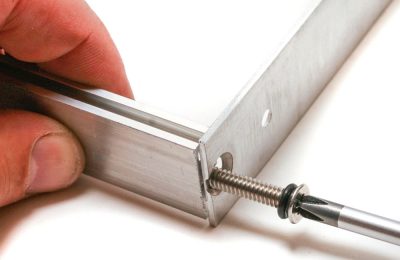
Screwing lower bracket into the lower rail
Now do the same to the bottom rail. Continue to do this to the other side.
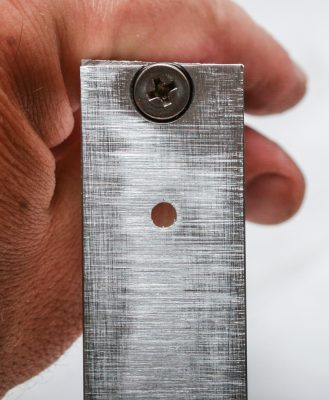
Tightening o-rings in place
Make sure the O-ring is evenly centered in the countersunk hole and screw as shown above. The screw should be flush with the bracket.
Lastly, rotate each rail slightly if needed so that it the rail end is lines up with the bracket. Set the finished rails on a flat surface and press down with your hands on the brackets to make sure everything is flat.
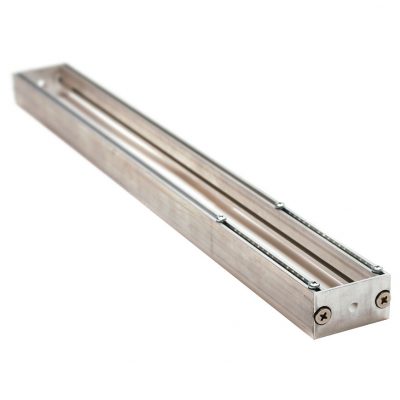
1U Eurorack Rails and Case Brackets Final

3U Eurorack Rails and Case Brackets Final
The next step will depend on the type of case that you are making. We suggest that you hold the brackets in your case, carefully mark where the mounting holes should go and drill pilot holes before mounting. If you are mounting the brackets in a metal, fiberglass, etc. case, then mark your holes, drill and place nuts and bolts (not included) to secure. Notice that the 1U Case Brackets come with just one screw hole on each side. The brackets are designed so that the outer dimension of the brackets are shallower than the rails. This allows 1U rails and 3U rails to touch each other and not the rails. This will help stabilize the 1U row.


Screwing in wood screws into case
Check for level or desired angle before placing final screws. You are super close to being done! Just place a couple modules in on both ends to double-check the rotation of your rails and you are good to go!


