DIY iDevice Audio Interface
November 15, 2013Holiday 2013 Synthrotek Mega Deals
November 28, 2013The Synthrotek Nandamonium is a monster dual drone with integrated delay created using two Synthrotek 4093 NAND Synths w/ SAG CV mod and a Synthrotek PT2399 Dev Delay w/ feedback mod. Today we’ll be taking a look at the internal wiring and providing a breakdown for the DIYers looking to build their own:

The Nandamonium is essentially created by chaining the outputs of both NANDs into the delay and wiring all three circuits to a common DC jack. Begin by following the standard assembly instructions for all circuits, taking care to omit the following:
-The DC jack on all circuits
-The outputs on the NANDs and the input on the the Delay
-The CV mod on the NANDs, as the wiring is different in the presence of a common DC jack
-Optional: refrain from installing an LED on one NAND (useful if installing in a case with a single LED mount) and short the SW1 connection on both NANDs (the CV on/off switch may generally be used in place of a power switch)
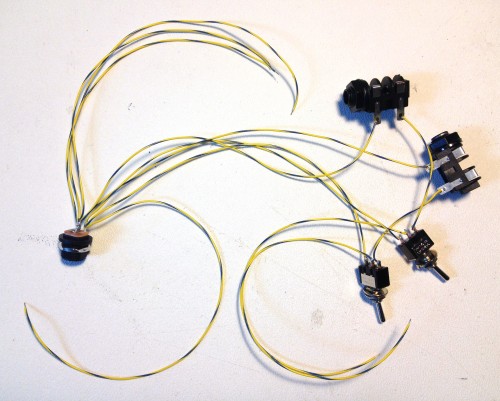
The DC jack wiring can be particularly confusing, and this close up of the wiring after connecting the CV mod but prior to installation provides a closer look at exact implementation:

The step-by-step DC jack wiring breakdown (for 9V center negative) is as follows:
-Run a wire from the ‘S’ contact on the DC jack to the ‘VCC’ contact on the delay
-Run a wire from the ‘P’ contact on the DC jack to the corresponding ‘VCC/GND’ contact on the delay
-Run wires from the ‘S’ contact to one of the outer contacts on each of the SPDT CV mod switches
-Run wires from the remaining outer contact on each of the SPDT switches to the tip connections on corresponding CV input jacks
-Run wires from the ‘P’ contact on the DC jack to the sleeve connections on each of the CV input jacks
-Run wires from the center contact on each of the SPDT switches to the ‘S’ contacts on each NAND PCB
-Run wires from the ‘P’ contact on the DC jack to the ‘P’ contacts on each NAND PCB
-Wire the ‘T’ contacts to the ‘IN’ connection and the ‘S’ contacts to the corresponding ‘IN/GND’ connection on the delay
Building your own Nandamonium is certainly not the most straightforward wiring job the world, but the rewards are well worth the effort! If you’d prefer to skip the hassle, you can always purchase a completed unit here at the Synthrotek store!


